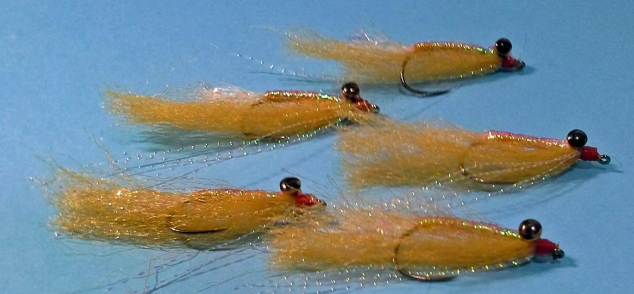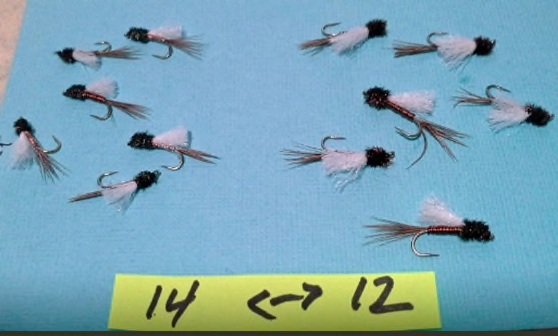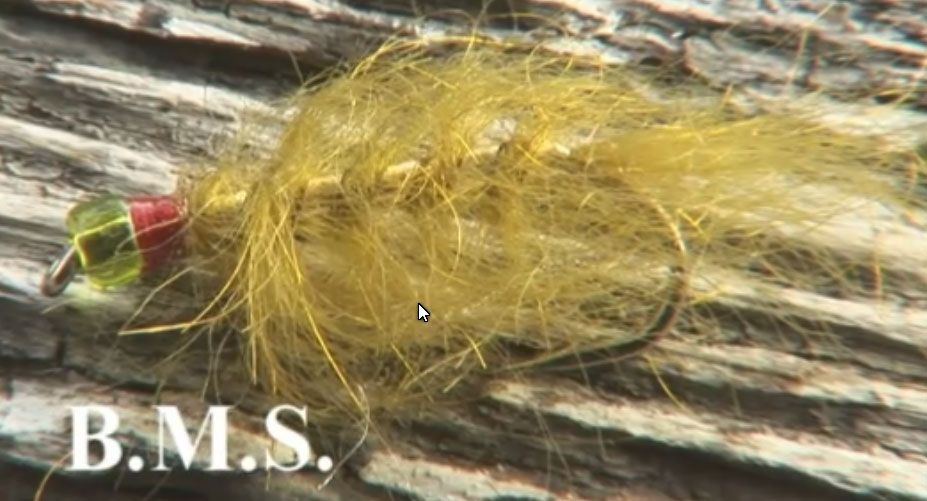
The Muz Wilson BMS, or “Bullen Merri Special” gets it’s name from Lake Bullen Merri near Camperdown in the volcanic plains of Western Victoria. It is highly regarded as an imitation of the Galaxiid Minnow when tied in olive and when in white, an Australian Smelt. The famed Tasmanian Whitebait (Lovettia) that creates amazing sight fishing opportunities for big Sea Trout on the Apple Isle is also imitated successfully with the white dubbed body and clear glass bead. With the tan or white body I think it makes for a great shrimp pattern too, in both fresh and estuarine waters with shrimp feeders such as Trout, Bream and Estuary Perch will eagerly take it as one.
In modern fly tying design we often talk about “trigger points” – those essential enticing features of the pattern that induce a take from a fish. When the late and very great Muz Wilson designed the BMS he wanted a pattern that was quick to tie, symmetrical in body shape so it always rode the right way through the water, with a translucent body and head highlighted with understated flash. In essence it evokes a fleeing and vulnerable baitfish, prey for the hungry fish.
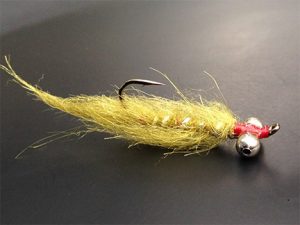
There are so many things about this pattern to like. It’s a very simple fly to tie and master, has a slightly scruffy and unassuming appearance when fresh off the vice but when wet the SLF fibres become translucent and the ribbing gleams through, bringing the whole pattern to life. The simple touch of red thread imitates the flared gills of a fleeing or injured baitfish further enhance by a glass bead that no only gives a realistic shimmer but helps the fly ride and swim enticingly through the water column.
Source: Northern Rivers Fly Fishing Club
Materials
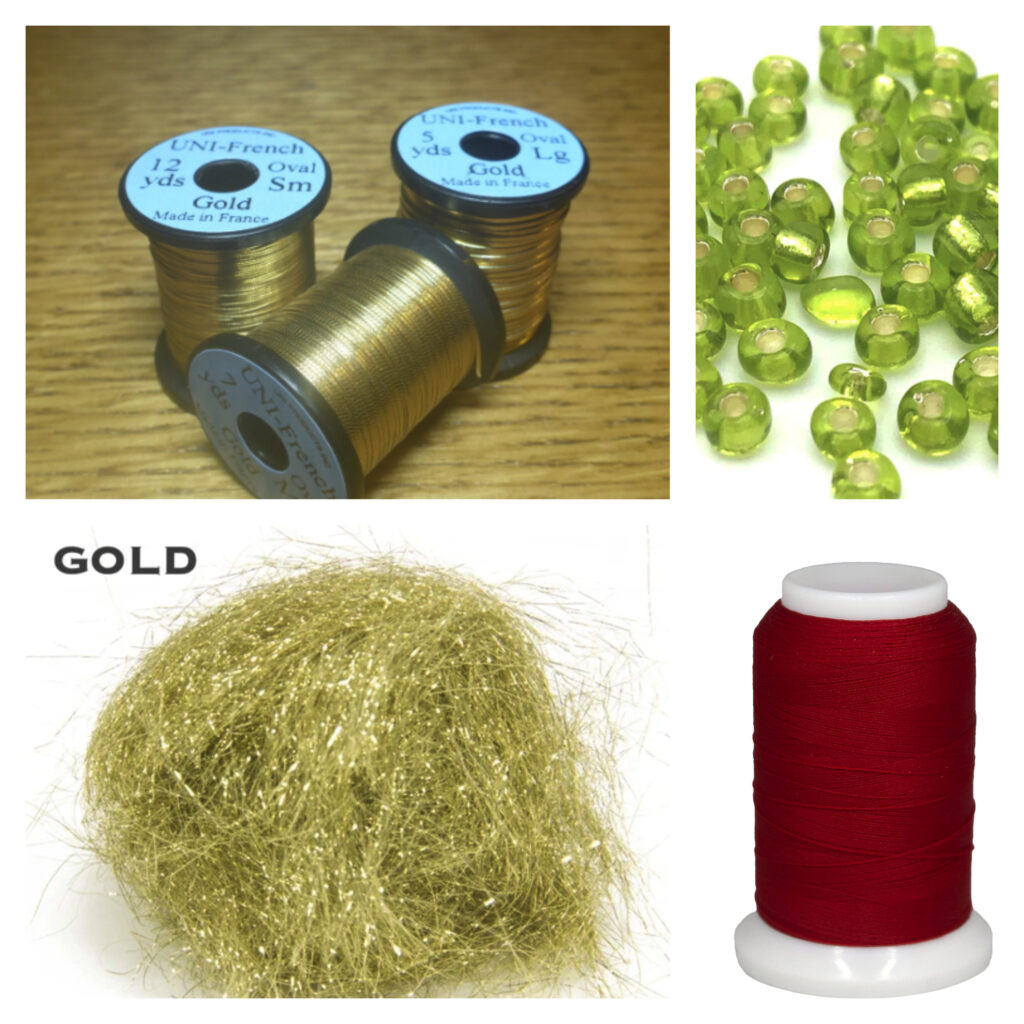
- Thread – Black 14-0 or Red Wooley nylon
- Hook – 3X, size 6, 8 or 10
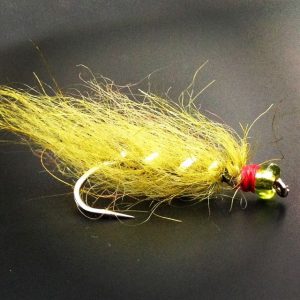
- Glass bead – Clear or Lime Green
- Body – BMS Dubbing gold or green
- Ribbing – Gold tinsel
Tying Instructions
- Place bead on hook, making a layer of thread on the hook.
- Thread back to the bead.
- Roll some dubbing into a ball and catch a little wrapping the thread back drawing the material out along the hook to create the tail.
- Tie in some gold tinsel with the silver side facing the hook.
- Make a dubbing loop and wrap dubbing material one bead length from the bead.
- Rib the fly making tinsel fairly tight. Tie off and lock tinsel in.
- Whip finish.
- Using Velcro, rub the body of the hook to draw out the dubbing material to create a bushy translucent body.
- If using black thread then wrap some red thread behind the bead head to create a red collar. Whip finish and coat with Sally Hansen’s Hard-as-Nails.
Fish this fly to visibly smelting trout and redfin on our western lakes when they are herding up schools of galaxias and Australian Smelt. Work it blindly in those likely areas around weed-beds and rocky points and drop offs where the baitfish gather for safety around structure. Use it in estuaries and tidal rivers on flats or around structure to feeding Bream and if you ever get the chance cast it to silvery Sea-Run Brown Trout in Tasmania’s coastal rivers when the Whitebait are running in Spring, good luck to you!
Freshwater Alternative – Olive BMS Hammerhead
Tied with bead chain or dumbbell eyes this fly becomes the BMS Hammerhead which is a serious Bream, Trout and Estuary Perch fly. I’ve used this pattern off various piers and jetties and have caught Snook, Trevally, Tailor, Flathead, Mackerel, Australian Salmon and Barracuda.
- Slide the bead through the hook point and bring all the way to the eye of the hook.
- Lay down a good layer of thread wraps (black thread) from behind the bead down the hook shank stopping above where the point is.
- Grab a fair pinch of dubbing between your thumb and forefinger and stroke the fibres out a bit, this will be the tail material. Tie down the fibres on the hook where you stopped the thread, stroking the fibres back and wrapping to create a tail about the length of the hook shank.
- Tie in the mylar rib with a few wraps where the tail is tied in, leaving about at least 1cm of tag and then tying down half of this tag (wrapping towards the eye) and then folding back the remaining mylar and tying back over towards the bend. Stop at the tail tie-in point. Mylar is slippery stuff, this step stops the ribbing from pulling out with fishes teeth or when you rough up the dubbed body
- Grab a good bunch of dubbing and roll into a tight ball between the palms of both hands- this will “crinkle” the dubbing, making it easier to dub on to the thread. Tease out the ball of dubbing and form a fairly loose chenille of dub on your thread. If you find it hard to dub, use a little beeswax or gluestick on the thread to help the fibres ad-here to the thread. Wind your dubbing up to the bead and pull any excess dubbing (if there is any) and let your bobbin hang. Don’t worry if the dubbing looks scruffy, it’s supposed to!
- Wind the mylar away from your body in even and fairly wide spaced wraps up to the bead (4 wraps on a size 10 would be enough). If you have a rotary vice this is as simple as holding the ribbing in your right hand while pulling down fairly firmly and rotating the vice-jaws with your left hand. Tie down the tag up to the bead and fold back the remaining tag and tie back over with a few more wraps to lock down the mylar and whip finish and cut the black thread.
- Grab a bit of Velcro and using the “hook” strip, run over the dubbing to pick it out and rough it up. This gives you the translucent fibres and the bulk of the fly’s shape.
- Tie in the red thread behind the bead and build up a little collar of wraps and then whip finish, trim thread and drop a bit of head cement while holding back the fibres out of the way.