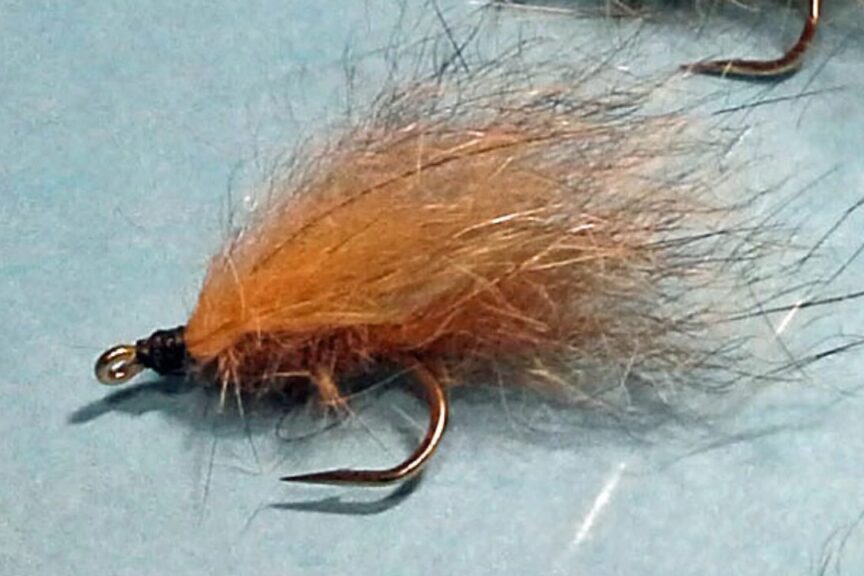

Fed’s Simple Possum Emerger is a minimalist yet highly effective fly that utilises natural possum fur to simulate an emerging insect. This emerger pattern is ideal for dry fly fishing, particularly during the early stages of a hatch when trout are actively seeking emergers just beneath the surface.
The possum fur gives it a subtle, realistic appearance, and the lightweight materials ensure that it sits right in the water column, enticing fish to strike.
Whether you’re targeting trout during a hatch or need an effective emerger pattern for stillwater or stream fishing, Fed’s Simple Possum Emerger is an excellent fly to have in your box. Its simplicity in materials and construction makes it a great fly for beginners while remaining a staple for experienced tiers and anglers.
Materials
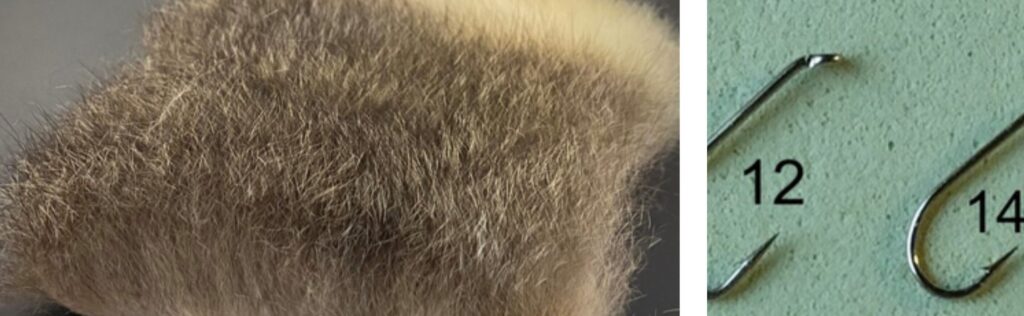
- Hook:Size 12 or 14 Dry
- Tail:Possum Fur
- Wing:Possum Fur
Pro Tip: Save all trimmings from the possum fur as you tie. Placing these in a coffee grinder creates a high-quality dubbing material that you can use for other fly patterns.
Tying Instructions
- Cover the Hook with Thread
Start by securely covering the hook shank with thread. This provides a strong foundation for the rest of your materials and prevents the fur from slipping. - Create the Tail
Tie a long amount of possum fur near the bend of the hook to form the tail. Ensure the tail is in proportion to the size of your hook, aiming for a natural and balanced look.

- Dub the Body
With the possum fur you saved earlier, dub a slender, tapered body from the tail to just behind the eye of the hook. A thin, sleek body helps maintain the delicate profile that emergers typically have as they rise toward the surface.
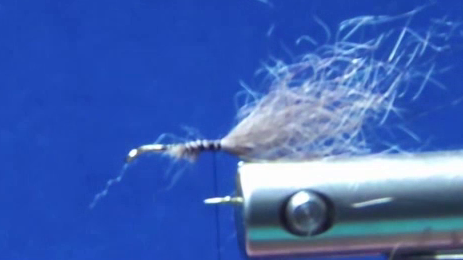
- Tie the Wing
Select a pinch of possum fur for the wing. Measure the length to match the combined length of the shaft and tail, ensuring a balanced appearance. Tie it in at the head, making sure the wing stays on top of the hook. This will simulate the emerging wings of the insect.


- Finish the Fly
Wrap a small head at the front of the fly and finish it off with a whip finish or a half hitch knot to secure the thread. Use your thumbnail to trim both the wing and the tail to the desired length, ensuring the proportions are neat and natural.
Adjustments for Smaller Sizes (Size 12 and Smaller)
For smaller sizes, the tying process is slightly different to accommodate the shorter hook shank:
- Tail Position: Instead of tying the tail at the bend of the hook, tie it in just behind the hook eye and extend it back to the bend.
- Dubbing: Use only a small amount of dubbing—just enough to cover the thread—while maintaining a slim body profile.
- Reverse Tie the Wing: In smaller sizes, reverse tie the wing as you would in a Pheasant Tail Nymph Emerger pattern. Fold it over to mimic the insect’s wings as it emerges.
- Brush and Trim: Brush the wing back gently and use your thumbnail to trim the wing to the proper size.