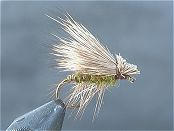
A classic caddis pattern used the world over. Simply substitute the body and wing colour to suit; the tying principals remain the same. It floats very well and is even very good skated across and down to rising fish slashing the naturals from the surface late in the day. Mainly used in sizes 14-16 and in a few colours with a green bodied and grey bodied being most prevalent.
Source: Goulburn Valley Fly Fishing Centre
Alternative: IntheRiffle.com
Recipe
- Hook: Tiemco TMC 100 (# 14-18)
- Thread: Olive/ Green/ Brown 6/0 Depending on body colour
- Hackle: Ginger/ Brown (Palmered)
- Body: Green/Grey/ Brown Dubbing
- Wing: Deer or Elk Hair
Instructions
First off wrap a nice even base of thread starting from near the front of the hook and extending to the point where you are going to tie in your first part of the fly, the tail. This point should be roughly level with the barb on the hook. Once this is completed and you have a good bed of thread proceed to step two.
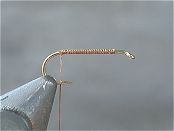
Next take a piece of copper wire and secure it to the hook at the rear of the fly. This wire should be tied in so that it protrudes out from the rear of the fly and is out of the way of your working space for constructing the rest of the fly. Once this is done trim the excess wire and cover with a few well placed turns of thread.
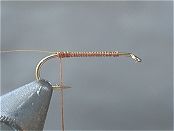
Now take some appropriate coloured dubbing and form a dubbed rope. For this pattern Antrons with their inherent flash are good but I have chosen to use a natural material here, dyed rabbit. Dub a fair length so you don’t run out while constructing the body and just remove the excess when finished. This will save time when tying a number of these in the one session.
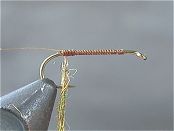
Next wind your dubbed rope forward towards the thread. Make each successive turn in front of the previous one but make sure you create a slightly tapered body. This is easy to do but you may have to make several wraps in the one plane as you get nearer the thread to get the required bulk. When you reach the thread remove the excess dubbing and proceed to step 5.
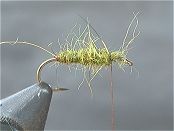
This step requires you to select a small ginger cock hackle. This will be to used to form the palmered hackle body which part of the reason why this pattern is so deadly. Tie it in angled slightly back and shiny side of the feather facing forward. Trim any excess hackle feather stubs and add a couple of turns of thread to strengthen.
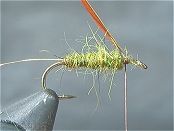
Wind the hackle back toward the wire at the rear of the fly. Use 4-5 even turns to get there and when you do use the wire to make 3 tight wraps around the hackle securing it in place. You can can then remove the excess feather and begin the ribbing of the pattern. When you are happy that the feather is secure and won’t unravel go to step 7.
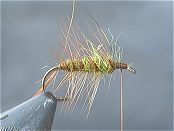
Once again using 4-5 turns of the wire wind it forward to the front of the fly. Be careful to not crush the hackle fibres already in place. This ribbing strengthens the fly and stops the palmered hackle from coming undone. When you reach the thread take tie off and remove the excess wire. Then carefully use you scissors to remove the top half of the hackle with one clean cut. This will help with the presentation of the wing.

Take a good clump of deer or elk hair. Measure it off against the hook shank so that the resulting wing is roughly equal in length to it. Grip the hair in between the thumb and forefingers of your left hand. Firstly take 2 turns around the hair and not the shank. Then clasping the hair tightly take several turns around the two already done this time wrapping around the hair and hook shank. Don’t let it spin!
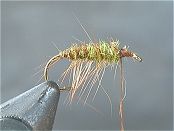
There you have your wing! Now with that same grip hold the deer hair tightly and take cut the excess hair on a 45 Degree angle to the rear and top of the fly keeping the head shape in line with the wing. Taker a couple more turns of thread in the same plane to secure and then add two half hitches to finish. It’s that easy.
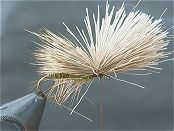
There you have your wing! Now with that same grip hold the deer hair tightly and take cut the excess hair on a 45 Degree angle to the rear and top of the fly keeping the head shape in line with the wing. Taker a couple more turns of thread in the same plane to secure and then add two half hitches to finish. It’s that easy!
