Scuds are one of the most important and reliable food sources for trout in both stillwaters and rivers. They’re abundant, protein-rich, and available year-round, making them a must-have in any angler’s fly box. But while scuds are everywhere, that abundance can sometimes work against us as fly fishers — when trout are surrounded by thousands of naturals, it can be difficult to make your imitation stand out.
That’s where the right balance of realism, flash, and movement makes all the difference.
Inspiration from the Lakes
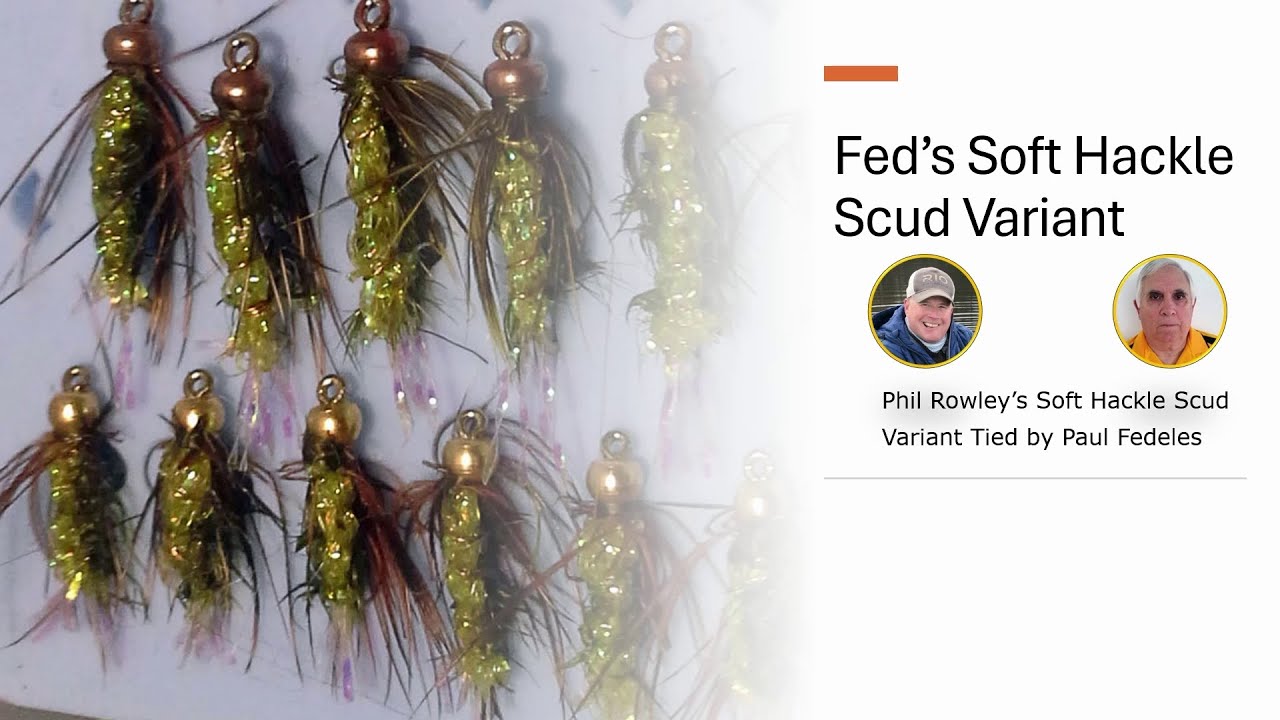
Fed’s Soft Hackle Scud Variant is a personal take on Phil Rowley’s Lakes-Mirage Soft Hackle Scud — a pattern designed to perform when scuds are at their most prolific. Rowley’s design combines a natural scud profile with subtle flash and mobility, giving it an edge in competitive conditions.
Fed’s version follows that same philosophy, but adapts it to the materials he had at hand, resulting in a durable, eye-catching fly that performs in both rivers and lakes.
Why Soft Hackle Scuds Work
The most consistent scud patterns capture three things:
- Profile & Size – matching the general shape of the naturals.
- Flash – a trigger that helps the fly stand out when scuds are plentiful.
- Mobility – subtle movement in the water, imitating the living pulse of a real scud.
Mobility is especially key. Not just in how you present the fly — slow retrieves, lifts, and drops — but also in the materials used to tie it. Ostrich herl, hen hackle, and other soft fibres add life and motion, even with the slightest current.
Fishing Fed’s Soft Hackle Scud Variant
Fed’s Soft Hackle Scud Variant fishes well under an indicator in rivers or on a floating line with a slow hand-twist retrieve in lakes. For pressured fish, try fishing it as part of a two-fly rig, pairing it with a smaller size 16 version to imitate the natural range of scuds trout encounter.
Materials
- Hook: Nymph size 12 and 2x size 16
- Thread: Dark Olive Sheer 14/0
- Bead: Copper
- Tail: Crystal Flash
- Rib: Copper Ultra Wire
- Shellback: Hareline Flat Diamond Braid Olive
- Body: Opal Tinsel
- Body Hackle: Olive Ostrich Herl
- Hackle: Olive India Hen


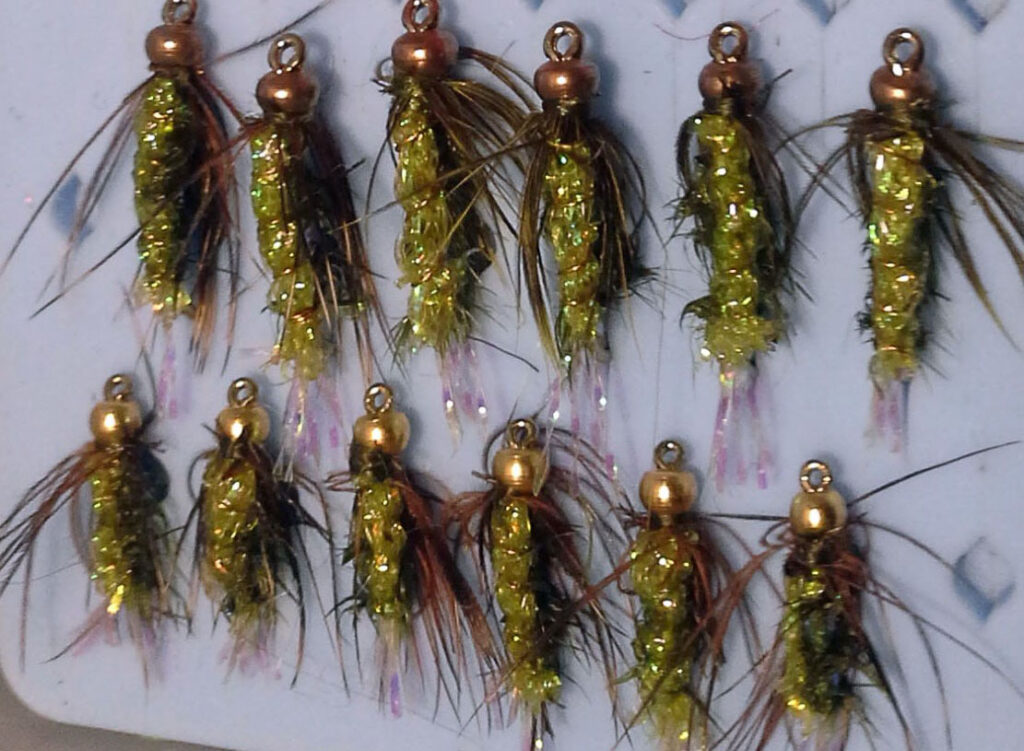
This version keeps the proven elements of Rowley’s design while introducing subtle changes in materials and colour tone.
The opal tinsel body combined with the diamond braid shellback creates a natural translucence that mimics the way light refracts through a living scud’s carapace. The copper bead and ribbing add both weight and segmentation, while the hen hackle legs pulse with movement, giving the fly its irresistible “alive” quality.
Tying Instructions
Part 1 – Foundations

- Place the bead on the hook before starting.
(Tip: add beads to all hooks you plan to tie beforehand for efficiency.)
- Start your thread and cover the shank.
- Tie in six strands of Crystal Flash at the bend. Trim a short tail. Save the excess material with a clip for your next fly.
- Tie in the copper wire rib along the near side of the hook.


- Tie in the shellback material (Flat Diamond Braid) starting at the hook point and securing it all the way forward to just behind the bead. Do not crowd the bead (DCTB).
- Return the thread to the bend of the hook.
- Tie in the opal tinsel at the bend.
- Coat the body area lightly with Sally Hansen’s Hard as Nails for durability.

Part 2 – Body and Shellback

- Clip your hackle pliers to the free end of the opal tinsel; the weight helps keep it straight.
- Wrap the tinsel in three smooth passes: up the body, back down, then up again to the bead. Tie off (DCTB).
- Tie in the olive ostrich herl behind the bead (DCTB).
- The recipe calls for two strands, but one works fine and is easier to manage.
- Brush on a thin coat of UV resin over the body but don’t cure yet.


- Palmer the ostrich herl forward, leaving slight gaps so the tinsel shows through.
- Secure the herl with one or two turns of the copper wire. This locks it in place.
- Now cure the UV resin.
- Fold the shellback (diamond braid) over the top of the fly and secure with the copper wire at the bead.


- Rib the body with the wire, segmenting as you go forward to the bead. Use hackle pliers to keep the wire under tension. Ensure the shellback stays centred on top. Tie off (DCTB).
Part 3 – Hackle and Finish
- Brush on another thin coat of UV resin over the body and cure.
- Tie in the olive hen hackle just behind the bead (there’s space because you didn’t crowd it).
- Phil Rowley recommends tying it in by the stem.
- Fed prefers tying it in by the tips for a softer look.


- Make 1–2 turns of hackle, folding fibres downward along the sides and under the hook as you tie off.
- Whip finish behind the bead.
- Final touch: train the hackle fibres with a hair dryer (Fed’s choice — bright purple and black!).